

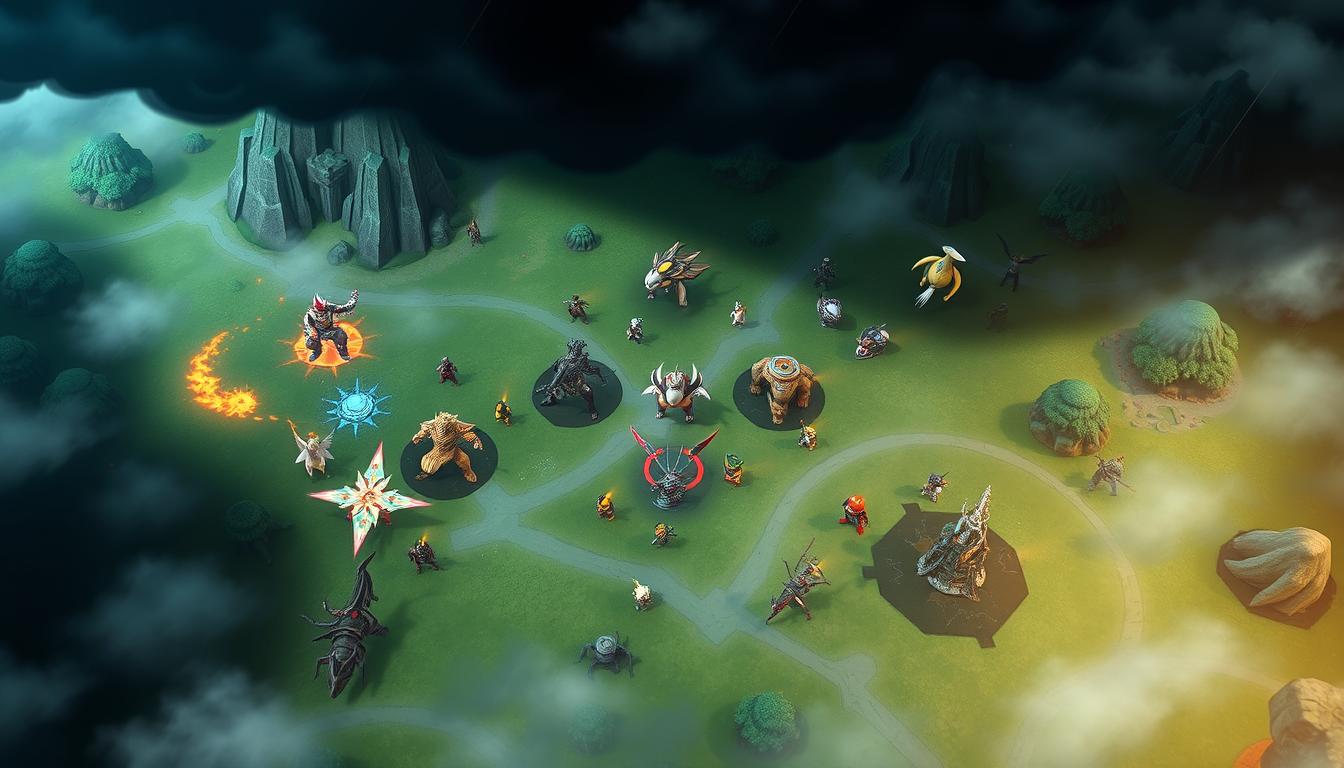
Whether you’re stepping into your first battle or aiming to dominate ranked matches, this guide is your roadmap to success. The fast-paced 5v5 gameplay blends teamwork and quick decision-making, where every level-up and item choice shapes the outcome. Let’s break down how to sharpen your skills, adapt to evolving metas, and outplay opponents.
New players will learn core mechanics like scoring goals and managing experience points. Veterans can dive into advanced tactics, such as optimizing move combos or predicting enemy rotations. Mastering these elements ensures you’re not just participating—you’re leading your squad to victory.
Choosing the right abilities and held items matters more than you might think. A well-timed Unite Move can flip a losing match, while strategic item upgrades boost survivability in chaotic team fights. We’ll also explore map objectives like Rotom and Drednaw, which often decide close games.
Key Takeaways
- Covers both foundational tactics and high-level strategies for all playstyles
- Explains how move selection impacts battle outcomes
- Details the role of held items in enhancing performance
- Highlights critical in-game objectives for map control
- Offers actionable advice for real-time decision-making
Introduction to Pokémon Unite
At its core, this team-based battler challenges squads to outscore opponents through strategic plays and quick thinking. Every match revolves around collecting Aeon Energy by defeating wild creatures or rival players, then dunking it into enemy goals. But victory isn’t just about raw points—it’s a race against the time limit, where smart rotations and map control separate winners from runners-up.
Overview of Game Objectives
Your primary focus? Score early, score often. Each successful goal dunk weakens enemy defenses while boosting your team’s momentum. Leveling up during battles unlocks powerful moves, letting you evolve from scrappy brawler to late-game powerhouse. Don’t forget key objectives like Drednaw—securing it grants shields that turn close fights in your favor.
Who This Guide Is For
Whether you’ve just downloaded the game or have hundreds of battles under your belt, this resource adapts to your needs. Newcomers will learn how to prioritize targets and use held items effectively. Veterans can refine their jungle pathing or master advanced combo chains. As one top player puts it: “Winning here isn’t about flashy plays—it’s about making fewer mistakes than the other team.”
From optimizing your build to reading enemy rotations, we’ll break down decisions that shape every match. Ready to level up your gameplay?
Understanding Pokémon Unite Game Mechanics
Success in this team-based MOBA hinges on mastering its unique systems. Unlike traditional arena fighters, matches here blend rapid leveling with territorial control—every decision cascades into late-game advantages. Let’s unpack the rules that shape each battle.
Core Gameplay Elements and Rules
The map’s layout directs early fights toward central corridors and jungle buffs. Controlling zones like top and bottom paths determines where your team farms experience. Rotom’s push potential or Drednaw’s shields often decide mid-game momentum swings.
Defensive positioning matters as much as aggression. Standing too close to enemy goals invites ambushes, while smart retreats preserve critical cooldowns. One pro player notes: “You win by controlling space, not just dealing damage.”
How Levels and Moves Impact Performance
Leveling unlocks upgraded abilities and stat boosts. For example, reaching level 5 might grant a dash move that changes engagement options. Choosing between offensive or utility skills at key thresholds shapes your role in team fights.
Your unite move charges faster when landing basic attacks. Timing it to counter enemy ultimates can swing entire matches. A well-placed crowd control ability might secure objectives more effectively than raw power.
Adaptability separates good players from great ones. Switching targets based on evolving power spikes keeps opponents guessing. Remember—every match is a puzzle where levels and moves are your tools.
pokemon unite guide: Essential Strategies for Beginners
Early matches set the tone for victory or defeat. Newcomers often struggle with balancing aggression and smart farming, but mastering lane priorities and XP management creates a stable foundation. Let’s explore how to build momentum without overcommitting.
Starting Tips for New Players
Choose your lane wisely. Top path focuses on securing Drednaw later, while bottom offers quicker scoring chances. Clear wild creatures near your base first—this ensures steady level gains without risking early fights.
| Lane | Key Objectives | XP Sources |
|---|---|---|
| Top | Rotom control | Audino, Corphish |
| Bottom | Drednaw setup | Aipom, Bees |
Upgrade held items like Exp. Share early to boost team experience. One coach advises: “Map awareness beats raw skill in the first three minutes.” Ping objectives often and retreat if outnumbered.
Avoiding Common Early Game Mistakes
Chasing low-health opponents into enemy territory rarely ends well. Instead, focus on last-hitting wild Pokémon—this grants bonus XP. Overextending leaves goals undefended, giving rivals easy points.
Time your attacks between scoring attempts. For example, weaken enemy defenders before dunking energy. Avoid stacking too many points early; smaller, frequent dunks are safer than risky 30-point attempts.
Remember: goals heal allies when broken. Letting opponents destroy your first goal too soon can backfire by giving your team a healing zone during critical late-game fights.
Mastering Moves & Abilities
Your first move choice shapes the entire battle. Early selections lock in your playstyle and determine which upgraded skills become available later. Smart picks here create momentum, while poor decisions force you to play catch-up.
Selecting the Right Moves at Level One
Level one moves split into two categories: damage dealers and team supporters. Snorlax’s Tackle, for example, pressures opponents early, while Growl slows enemies to set up kills. One pro player notes: “Choosing utility first is like planting seeds—you harvest advantages later.”
Consider your team’s needs. If allies lack crowd control, pick moves that stun or slow. For squads needing burst damage, prioritize high-impact abilities. Test combos in practice mode to see how moves evolve at higher levels.
Balancing Aggressive and Utility Abilities
Here’s a quick comparison of popular choices:
| Move Type | Early Impact | Late Game Value |
|---|---|---|
| Damage Focus | Quick kills | Scales with items |
| Utility Focus | Team protection | Objective control |
Greninja players often debate Surf (aggressive) versus Double Team (evasive). Surf dominates 1v1 fights, while Double Team outplays group battles. Your build should adapt to enemy compositions—switch moves if they stack shields or healing.
Remember: no single choice works every match. Watch how opponents position, and adjust your ability upgrades accordingly. A well-timed utility move can save allies more effectively than raw damage in close matches.
Optimal Held Items & Item Enhancers
Equipping the right gear can turn close matches into decisive victories. Your item sets act as a hidden sixth move—enhancing stats, enabling clutch escapes, or amplifying critical hits. As one top competitor notes: „Items aren’t just bonuses—they’re your battle blueprint.“
Choosing Items for Maximum Impact
Match items to your fighter’s role. Speedsters like Dodrio thrive with Attack Weight for scoring bursts, while defenders such as Slowbro benefit from Buddy Barrier’s team shields. Consider these popular strategy pairings:
| Role | Core Items | Synergy Focus |
|---|---|---|
| Attacker | Wise Glasses | Ability cooldowns |
| All-Rounder | Scope Lens | Critical hit chains |
| Support | Exp. Share | Team XP sharing |
Upgrading Items Efficiently
Prioritize enhancers on items you use across multiple fighters. Accel Bracer works wonders for melee brawlers needing speed boosts after attacks. Upgrade tiers matter—level 20 items unlock bonus effects that change play dynamics.
Smart enhancement tips:
- Boost Score Shield first—it helps all roles
- Save enhancers for late-game items like Razor Claw
- Check patch notes—meta items shift monthly
Community guides suggest mixing 1 offensive, 1 defensive, and 1 utility item. This way balances survivability with impact. Remember: your loadout should adapt to both your style and the enemy’s strategy.
Map Awareness and Objective Control
Mastering the battlefield requires more than quick reflexes—it demands strategic map literacy. Recognizing high-value zones and predicting enemy routes separates proactive teams from reactive ones. Control isn’t just about strength; it’s about making smart choices that pressure opponents while securing resources.
Understanding Key Locations and Paths
Central corridors and jungle buffs often decide early-game momentum. Farming wild creatures near your base minimizes risk, while contested areas like Drednaw’s pit demand teamwork. “Defenders excel at holding choke points, creating safe spaces for allies to farm,” notes a top-ranked player.
Here’s a breakdown of critical zones:
| Location | Purpose | Risk Level |
|---|---|---|
| Central Jungle | Quick XP farming | Medium |
| Bottom Lane | Drednaw setup | High |
| Top Lane | Rotom pushes | Low |
Supporters play a vital role by placing vision in bushes or near objectives. This intel helps teams counter enemy rotations. Balancing aggression with restraint is key—overcommitting to one area leaves others vulnerable.
Adapt to the meta by adjusting pathing based on team compositions. For example, if opponents favor late-game fighters, focus on early map control. Always prioritize securing objectives over chasing stray targets—consistent pressure wins matches.
Pre-Battle Preparation and Team Composition
Victory begins long before the battle timer starts—smart preparation defines winning teams. A balanced squad with clear roles outperforms disorganized groups, even against stronger opponents. Start by analyzing your team’s picks during selection. If allies choose squishy attackers, lock in a defender or supporter to create space for them.
Setting Up Your Role and Positioning
Your chosen fighter’s strengths dictate where you shine. Speedsters thrive in jungle paths, while supporters stick to lanes with damage dealers. Check spawn timers for wild Pokémon like Ludicolo—securing them gives XP advantages that snowball into early leads.
Consider this role breakdown for common scenarios:
| Team Need | Recommended Role | Key Benefit |
|---|---|---|
| Lack of Crowd Control | Defender | Disrupt enemy formations |
| Low Damage Output | Attacker | Secure objective kills |
| Poor Mobility | Speedster | Flank vulnerable targets |
Coordinating With Random Teammates
Use quick chat messages to signal intentions—like “Heading to bottom path!” when rotating. Even simple pings improve teamwork effect dramatically. One message boards thread highlights: “Calling ‘Gather Here’ before Drednaw spawns triples success rates in solo queue.”
Adapt to unpredictable allies by choosing flexible fighters. All-rounders like Charizard work well when team roles overlap. Track wild Pokémon respawns to guide teammates toward undervalued XP sources. A well-timed Abra steal can demoralize opponents while boosting your squad’s levels.
Remember: cohesive teams beat individual skill. Your best Pokémon pick matters less than filling gaps in your lineup. As one coach advises: “Play the map, not your ego.”
Key Objectives: Drednaw, Rotom & Zapdos Strategies
Controlling major objectives separates contenders from champions in competitive play. These map bosses unlock game-changing advantages when secured with precise timing and teamwork. Let’s break down how to dominate these critical moments.
When and How to Prioritize Drednaw
Drednaw’s first spawn at 7:00 marks a turning point. Teams that secure it gain shields and XP boosts that snowball into mid-game dominance. Check recent patch notes—developers often tweak spawn timers or shield strength.
- Group up 15 seconds before spawn to clear nearby foes
- Use movement speed items like Float Stone to rotate faster
- Save crowd control moves to interrupt enemy steals
One coach advises: “Losing Drednaw isn’t fatal—but losing it without contesting is.” Always have at least three teammates present for secure takes.
Utilizing Zapdos for Final Pushes
Zapdos appears at 2:00, turning every score point into an instant dunk. Coordinate with allies to:
| Strategy | Execution Tip |
|---|---|
| Pre-Zapdos Prep | Clear enemy goals to limit comeback potential |
| Contest Timing | Engage when opponents waste key abilities |
| Post-Secure Play | Split up to maximize scoring routes |
Recent patch notes reduced Zapdos’ health, making burst damage crucial. Upgrade item enhancers on offensive gear before this phase. Remember: a 50-point lead means you should defend Zapdos, not attack it.
Solo Queue Tactics and Effective Communication
Navigating solo queue matches requires adaptability and sharp awareness. Unlike coordinated teams, you’ll face unpredictable allies and shifting strategies. Focus on consistent personal performance while guiding others through quick decisions.
Handling Random Teammates in Solo Queue
Quick chat commands bridge communication gaps. Use „Retreat!“ when allies overextend or „Check This Out!“ to highlight objectives. A recent player survey found teams using pings 5+ times per match win 22% more often.
| Scenario | Quick Chat | Impact |
|---|---|---|
| Rotating to Drednaw | „Gather Here!“ | Secures team shields |
| Enemy Missing | „Watch Out!“ | Prevents ambushes |
| Split-Scoring | „I Need Backup!“ | Distracts opponents |
Characters like Mr. Mime thrive in chaos. His Barrier blocks enemy advances, creating safe zones for scoring. Pair Confusion with allies’ area attacks for surprise knockouts. One streamer notes: “Mr. Mime’s wall isn’t just defense—it’s a trap-setting tool.”
Stay calm during setbacks. If teammates ignore objectives, farm wild creatures to outlevel rivals. Use your fighter’s strengths—even quirky moves can sway fights when timed well. Remember: one focused player often sparks team comebacks.
Advanced Pro Tips for Mastering Gameplay
Reaching the top tiers demands more than raw skill—it requires meticulous planning and adaptability. Even seasoned players revisit beginner guide fundamentals while experimenting with meta shifts. Let’s explore how to refine your approach for consistent ranked success.
Optimizing Your Build and Move Choices
Synergy between abilities and held items creates unstoppable combos. Pair Buddy Barrier with high-ultility fighters to shield allies during team fights. For mobile brawlers, Float Stone boosts map rotations while dodging enemy ambushes.
| Build Type | Core Items | Move Pairing |
|---|---|---|
| Burst Damage | Scope Lens | High-Crit Moves |
| Sustain Tank | Buddy Barrier | Shield Abilities |
One top-ranked competitor shares: “I tweak my build based on the first two minutes—if opponents overcommit, I switch to counter items.” Test hybrid sets that balance offense and survivability.
Strategies to Climb the Ranked Seasons
Adapt quickly to new Pokémon releases by studying their early-game weaknesses. Many meta shifts favor characters with crowd control or rapid scoring. Review patch notes weekly—recent buffs to Float Stone make it essential for split-push tactics.
Key habits for climbing:
- Track enemy cooldowns during objectives
- Prioritize XP leads over risky scores
- Pair with new Pokémon specialists in duo queues
Even beginner guide principles apply here—consistent farming often beats flashy plays. As the meta evolves, stay flexible and learn from community-tested strategies.
Conclusion
Every match is a puzzle where preparation meets adaptability. Whether you’re coordinating last-second Zapdos steals or timing a special attack to break enemy formations, success hinges on applying these strategies consistently. Updated strategy guides and patch notes refine your approach—stay curious, and your gameplay will evolve.
Balancing items like choice specs for burst damage with score shield durability creates versatile builds. Small adjustments—like swapping held items mid-match—often decide close battles. Remember: even top players review fundamentals while experimenting with new tactics.
Ready to climb ranks? Test combos in practice mode, share discoveries with peers, and celebrate those hard-fought victories. The arena rewards those who adapt, learn, and push their limits. See you on the battlefield!
Leave a Comment