Welcome to the ultimate guide for mastering Greninja in Pokemon Unite! Whether you’re a seasoned player or just starting out, this article will help you optimize your gameplay with the best moveset and items for 2025.
Greninja is a versatile and powerful character, known for its speed and agility. This guide will walk you through the most effective strategies, including item choices and move explanations, to maximize your performance in battles.
Based on the latest patch notes and community insights, we’ve compiled everything you need to know about Greninja’s abilities and gameplay style. You’ll learn how to leverage its strengths and counter its weaknesses to dominate the battlefield.
Our guide is structured to make it easy for you to find the information you need. From fundamental strategies to advanced techniques, we’ve got you covered. Let’s dive in and make the most out of your Greninja experience!
Key Takeaways
- Discover the best moveset for Greninja in 2025.
- Learn which items to use for maximum effectiveness.
- Understand Greninja’s abilities and how to use them strategically.
- Get insights from the latest patch notes and community feedback.
- Find out how to counter common weaknesses and enhance strengths.
Overview and Introduction
Ready to dominate the battlefield in 2025? This guide is your key to success. Whether you’re a seasoned player or new to the game, we’ll help you master one of the most agile characters available. Let’s dive into the latest strategies and updates to keep you ahead of the competition.
In 2025, the competitive landscape has evolved, and staying updated is crucial. This guide focuses on maximizing your character’s potential, from understanding its stats to leveraging its strengths in team fights. With the latest patch notes in mind, we’ll break down everything you need to know.
Article Purpose & 2025 Context
This guide is designed to help you navigate the current meta. We’ll cover the best moves, items, and strategies to enhance your gameplay. With detailed explanations and insights, you’ll be well-equipped to handle any challenge.
Why Greninja is a Top Choice
Greninja stands out as a top attacker due to its impressive damage output and speed. Its ability to deal consistent attacks makes it a valuable asset in any team. Additionally, its leveling pace ensures you can dominate early and late-game scenarios.
Here’s what makes Greninja a standout choice:
- High damage potential with versatile moves.
- Quick leveling to unlock key abilities early.
- Agility that allows for effective positioning and escapes.
By the end of this guide, you’ll have a clear understanding of how to optimize your gameplay and make the most of this powerful character.
Understanding Greninja’s Role and Abilities
Mastering the role of a damage dealer requires understanding both mechanics and strategy. Greninja excels in this role, combining high damage output with exceptional speed. Its ability to quickly eliminate enemy targets makes it a formidable force on the battlefield.
Attacker Fundamentals and Damage Dynamics
As an attacker, Greninja thrives on delivering consistent damage. Its moves are designed to maximize attack speed and precision. For example, Water Shuriken not only deals significant damage but also reduces cooldowns, allowing for rapid follow-up attacks.
Patch notes from recent updates have further enhanced Greninja’s capabilities. These changes ensure that its stats remain competitive, making it a top choice for players who prioritize offense.
The Unique Mechanics of Greninja
Greninja’s gameplay is defined by its unique mechanics. Its stealth abilities, like Smokescreen, allow it to evade enemy detection. This effect creates opportunities for surprise attacks or strategic retreats.
Another standout feature is its use of illusions. Moves like Double Team confuse opponents, making it harder for them to predict Greninja’s next move. This unpredictability is a key factor in its success.
“Greninja’s speed and versatility make it a top-tier attacker in the current meta.”
Here’s a breakdown of Greninja’s key stats and their impact:
| Stat | Impact |
|---|---|
| Attack | High damage output for quick eliminations |
| Speed | Allows for rapid positioning and escapes |
| Endurance | Low, requiring careful play to avoid being targeted |
By leveraging these fundamentals, you can dominate both offensive and defensive scenarios. Understanding Greninja’s role and abilities is the first step toward mastering its gameplay.
Core Moves Overview
Greninja’s moveset is designed to balance damage, utility, and survivability. Each ability plays a crucial role in its gameplay, offering unique advantages that can turn the tide of battle. Let’s break down the core moves that define its offensive and defensive strategies.
Water Shuriken: Damage, Healing, and Cooldown Reduction
The Water Shuriken is a versatile move that excels in both offense and sustainability. It deals significant damage to opponents while also restoring HP with each hit. This dual effect makes it a reliable choice for prolonged engagements.
Additionally, the move reduces cooldown times, allowing for quicker follow-up attacks. This mechanic ensures Greninja can maintain pressure on enemies without long delays. Recent patch updates have further enhanced its effectiveness, making it a cornerstone of Greninja’s moveset.
Double Team and Smokescreen: Illusions and Stealth
Double Team creates illusions that confuse opponents, making it harder for them to predict Greninja’s next move. This ability is particularly useful for disrupting enemy strategies and creating openings for attacks.
On the other hand, Smokescreen provides stealth, allowing Greninja to evade detection and reposition strategically. This move is ideal for surprise attacks or escaping dangerous situations. When upgraded, it also boosts attack power, adding another layer of utility.
Here’s how these moves synergize:
- Water Shuriken keeps enemies at bay while sustaining Greninja’s health.
- Double Team creates chaos, making it easier to land critical hits.
- Smokescreen ensures Greninja can escape or reposition safely.
By mastering these core moves, you can maximize Greninja’s potential and dominate the battlefield. Whether you’re dealing damage, healing, or confusing opponents, these abilities offer the tools you need to succeed.
Held Items and Battle Items Essentials
Choosing the right items can make or break your performance in battles. Held and battle items are critical for enhancing your character’s strengths and covering weaknesses. This section dives into the best options to optimize your gameplay.
Muscle Band, Focus Band, and Their Benefits
The Muscle Band is a top choice for increasing attack speed and dealing bonus damage. It’s particularly effective for characters who rely on rapid hits. The Focus Band, on the other hand, provides healing when your health is low, making it a lifesaver in tight situations.
Here’s a quick comparison of their benefits:
| Item | Benefit |
|---|---|
| Muscle Band | Boosts attack speed and bonus damage |
| Focus Band | Provides healing at low health |
Scope Lens, Attack Weight, and Alternative Options
The Scope Lens is ideal for increasing critical hit damage, making it a great choice for high-damage builds. For those who prefer a more aggressive approach, the Attack Weight boosts attack power with each goal scored, scaling well into late-game scenarios.
Consider these alternatives based on your playstyle:
- Scope Lens: Enhances critical hits for burst damage.
- Attack Weight: Scales attack power with goals.
Adjusting your item build based on enemy composition and game pace is crucial. For example, against tanky opponents, the Scope Lens can help deal significant damage, while the Focus Band ensures survivability in prolonged fights.
Optimal Emblem Loadouts for Greninja
Emblem loadouts play a crucial role in shaping your character’s performance. In this build guide, we’ll explore how to maximize Greninja’s potential by focusing on the right emblem combinations. Whether you’re aiming for higher damage or better survivability, the right setup can make all the difference.
Stat Priorities and Color Combinations
When selecting emblems, prioritize stats that align with Greninja’s strengths. Attack and critical hit rate are essential for maximizing damage output. Additionally, a focus on HP can improve survivability, especially in high-pressure situations.
Community experts recommend a combination of 6 Brown and 6 White emblems. This setup boosts attack power while enhancing mobility, allowing Greninja to reposition quickly during battles. Here’s why this combination works:
- Brown Emblems: Increase attack power, making each hit more impactful.
- White Emblems: Improve mobility, ensuring Greninja can evade threats and secure kills.
Balancing these stats is key to creating a versatile loadout. For example, a higher critical hit rate can turn the tide in close encounters, while increased HP ensures Greninja stays in the fight longer.
Meta trends also show that emblem configurations focusing on attack and mobility are currently the most effective. By following these guidelines, you can optimize your emblem setup and dominate the battlefield.
Essential pokemon unite greninja build Strategies
Adapting your strategy in real-time is key to mastering competitive play. Whether you’re facing a tough enemy or working with your teammates, flexibility can turn the tide of any match. This section explores how to adjust your build dynamically and create synergy within your team.
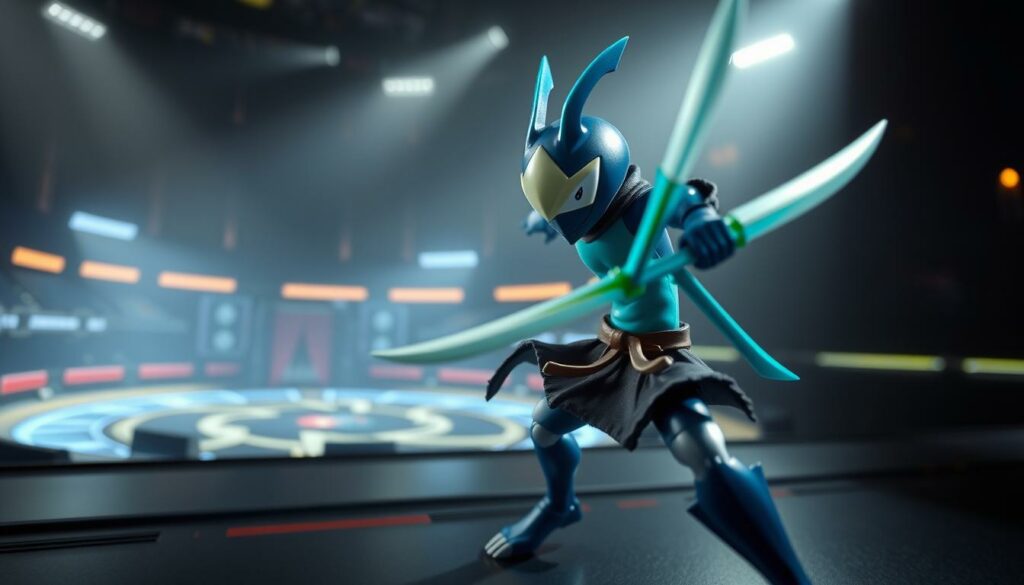
Situational Adjustments and Item Swaps
One of the most effective ways to counter your opponents is by swapping items mid-game. For example, if you’re up against a tanky team, consider switching to a battle item like Scope Lens to boost critical hit damage. On the other hand, if survivability is an issue, Focus Band can provide much-needed healing.
Here are some tips for making situational adjustments:
- Analyze the enemy team’s composition early in the match.
- Swap items based on their strengths and weaknesses.
- Use Eject Button for quick escapes or repositioning.
Team Synergy and Counter Plays
Creating synergy with your teammates is just as important as individual performance. Coordinate with your team to maximize Greninja’s strengths. For instance, pair up with a support character to enhance your survivability while dealing damage.
Effective counter plays involve predicting your opponent’s moves and adapting accordingly. Use Smokescreen to evade threats or Double Team to confuse them. These strategies can create openings for your team to secure objectives.
“Adaptability is the hallmark of a great player. Always be ready to adjust your strategy based on the flow of the game.”
By staying flexible and working closely with your team, you can dominate even the toughest matches. Remember, the key to success lies in analyzing the situation and making smart, timely adjustments.
Movement, Positioning, and Map Awareness
Effective movement and positioning are the backbone of any successful strategy. These elements are crucial for maximizing your character’s potential and ensuring you stay ahead of the competition. Whether you’re farming safely or engaging in battles, understanding how to move and position yourself can make all the difference.
Farming Safely and Early Game Strategies
Proper farming techniques are essential for gaining an early advantage. In the jungle, focus on securing wild Pokémon to level up quickly. This not only boosts your stats but also improves map control. Start with weaker targets like Swablu and gradually move to stronger ones like Altaria.
Here are some tips for safe farming:
- Use movement speed to traverse the jungle efficiently.
- Prioritize targets that provide the most experience points.
- Always be aware of enemy positions to avoid ambushes.
Early game strategies also involve positioning yourself to assist teammates. By leveling up quickly, you can transition to lanes and provide much-needed support. This early advantage can set the tone for the rest of the match.
Using Movement Speed to Your Advantage
Movement speed is a key factor in both offense and defense. It allows you to dodge enemy attacks and reposition during fights. Items like Float Stone can enhance your speed, making it easier to escape dangerous situations or chase down opponents.
Positioning is equally important. Always aim to engage from angles that minimize exposure to enemy fire. This not only increases your survivability but also maximizes your damage output. Awareness of map dynamics is vital for making informed decisions during intense matchups.
| Strategy | Benefit |
|---|---|
| Safe Farming | Accelerates leveling and improves map control |
| Movement Speed | Enhances dodging and repositioning capabilities |
| Positioning | Reduces exposure to enemy attacks |
By mastering these techniques, you can dominate the early game and set yourself up for success. Remember, awareness and adaptability are your greatest allies in any match.
Progression and Leveling Guide
Understanding the progression and leveling system is essential for maximizing your character’s potential. Knowing when to unlock key skills and how to balance farming with aggressive plays can significantly impact your performance. This guide will walk you through the critical milestones and strategies to dominate the game.
Unlocking Key Skills at Critical Levels
Leveling up is a core part of gameplay, and it directly affects your character’s damage output and attack speed. For example, at Level 5, you unlock Surf, a powerful move that deals significant damage and provides mobility. This skill is a game-changer, allowing you to engage in battles more effectively.
At Level 7, you evolve into your final form, unlocking even more potential. This is when you gain access to Water Shuriken, a move that not only deals damage but also restores HP. Timing these unlocks correctly ensures you’re always ahead of the competition.
Here’s a breakdown of the key levels and their benefits:
- Level 5: Unlock Surf for increased mobility and damage.
- Level 7: Evolve and gain Water Shuriken for sustainability.
- Level 9: Upgrade skills for enhanced performance in late-game scenarios.
Balancing farming with aggressive plays is crucial. Focus on securing wild Pokémon in the central area for faster experience gain. This strategy ensures you reach critical levels quickly, giving you an edge in battles.
“Proper leveling and skill unlocks are the foundation of a strong gameplay strategy.”
By following this progression plan, you can optimize your character’s growth and dominate the battlefield. Remember, timing and strategy are key to success.
Combos and Execution Tactics
Mastering combos is essential for maximizing your damage output. By combining abilities effectively, you can dominate your opponents and secure key objectives. This section dives into advanced techniques that will elevate your gameplay.
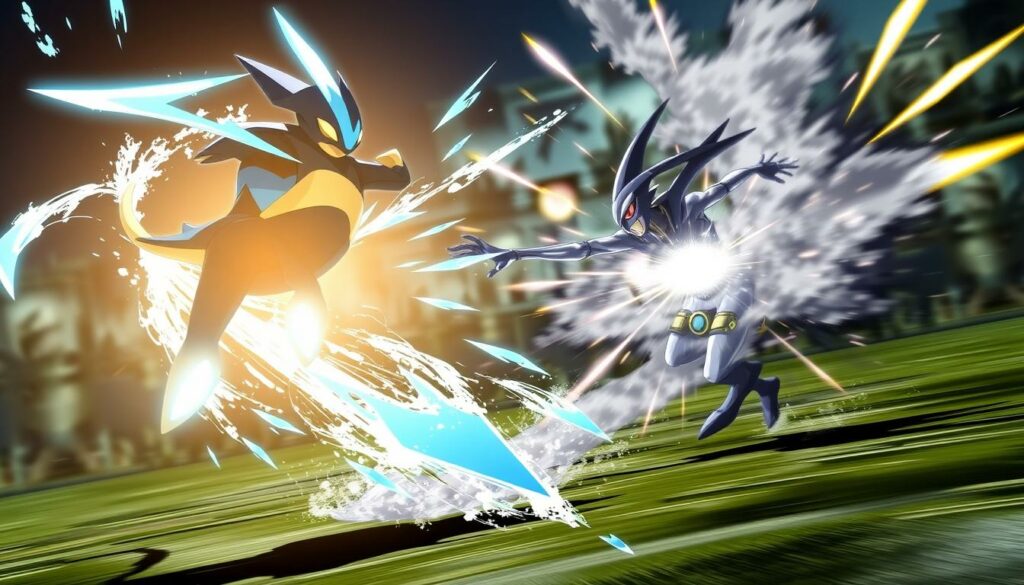
Surf and Shuriken Combos for Burst Damage
One of the most effective combos involves using Surf followed by Water Shuriken. Surf deals significant damage and resets its cooldown if it knocks out an enemy. This allows you to chain it with Water Shuriken for sustained pressure.
Here’s how to execute this combo:
- Use Surf to close the gap and deal initial damage.
- Follow up with Water Shuriken to finish off weakened opponents.
- Time your abilities to maximize attack damage and minimize downtime.
This combo is particularly effective against squishy targets, as it ensures quick eliminations. Practice the timing in training mode to perfect your execution.
Double Team Setups for Disruption
Double Team is a versatile move that creates illusions, confusing opponents and creating openings for attacks. When combined with Smokescreen, it becomes a powerful tool for disruption.
Here’s how to use Double Team effectively:
- Activate Double Team to create illusions that mimic your movements.
- Use Smokescreen to reposition and confuse enemies further.
- Strike from unexpected angles to maximize damage output.
This setup is ideal for team fights, as it disrupts enemy formations and creates opportunities for your team to secure kills. Remember to manage your cooldowns to ensure these abilities are available when needed.
| Combo | Effect |
|---|---|
| Surf + Water Shuriken | High burst damage and cooldown reset |
| Double Team + Smokescreen | Disruption and confusion for team fights |
By mastering these combos, you can significantly enhance your gameplay. Focus on timing and ability synergy to maximize your impact on the battlefield.
Matchups, Counters, and Counter Strategies
Understanding how to handle different opponents is crucial for success. Every battle requires a unique approach based on your enemy’s strengths and weaknesses. This section will help you identify threats and develop effective counter strategies for both fragile and bulky opponents.
Counters for Fragile Vs. Bulkier Opponents
Fragile opponents, like Attackers and Supporters, are often high-priority targets. Use moves like Water Shuriken to deal quick bursts of damage and secure eliminations. Against bulkier foes, focus on sustained damage and strategic positioning to whittle them down.
Here’s how to counter different types of opponents:
- Fragile Opponents: Prioritize burst damage and quick eliminations. Use Smokescreen to evade their attacks and reposition for surprise strikes.
- Bulkier Opponents: Opt for sustained damage and mobility. Items like Scope Lens can help increase critical hit damage, making it easier to take them down.
Adjusting your playstyle is essential. For example, against high-mobility enemies, focus on crowd control and disruption. Moves like Double Team can confuse them, creating openings for your team to secure kills.
“Adaptability is key. Always be ready to switch strategies based on your opponent’s strengths and weaknesses.”
Tactical positioning is another critical factor. In team fights, aim to target weak enemies first while avoiding heavy hitters. Use your speed to stay mobile and unpredictable, making it harder for opponents to land hits.
By mastering these strategies, you can turn unfavorable matchups into opportunities for comeback plays. Stay flexible, analyze the battlefield, and adapt your approach to dominate every fight.
Community Insights and Meta Trends
Staying ahead in the competitive scene requires keeping up with the latest updates and trends. The community’s feedback and patch notes play a crucial role in shaping the meta. This section dives into recent changes and how they impact your gameplay.
Latest Nerfs & Buffs: Impact on Build Viability
Recent updates have introduced significant nerfs and buffs that directly affect damage output and build viability. For example, Water Shuriken’s healing effect was slightly reduced, making sustainability a bit more challenging. On the other hand, Smokescreen’s stealth duration was increased, enhancing its utility in battles.
These changes have shifted the meta, encouraging players to adapt their strategies. Here’s a breakdown of the key adjustments:
- Water Shuriken: Healing reduced by 10%, impacting sustainability.
- Smokescreen: Stealth duration increased by 1 second, improving escape and repositioning options.
- Double Team: Illusion duration extended, making it more effective for disruption.
Understanding these changes is essential for optimizing your guide and staying competitive.
Popular Community Build Variations
The community has experimented with various builds to adapt to the latest meta. One popular variation focuses on maximizing damage output with items like Scope Lens and Muscle Band. This setup prioritizes critical hits and attack speed, making it ideal for aggressive players.
Another trending build emphasizes survivability by incorporating Focus Band and Buddy Barrier. This approach ensures you stay in the fight longer, even against tough opponents. Here’s a comparison of the two builds:
| Build Type | Key Items | Strengths |
|---|---|---|
| Damage-Focused | Scope Lens, Muscle Band | High burst damage, quick eliminations |
| Survivability-Focused | Focus Band, Buddy Barrier | Improved durability, better team support |
Both builds have their merits, and choosing the right one depends on your playstyle and team composition. Community feedback suggests that the damage-focused build is currently more popular due to its high output potential.
By staying updated with these trends and experimenting with different builds, you can refine your strategy and dominate the game. Remember, adaptability is key to success in any competitive environment.
Tips and Advanced Techniques for Competitive Play
Elevate your gameplay with advanced strategies tailored for competitive play. Whether you’re engaging enemies, escaping dangerous situations, or positioning yourself for success, these tips will help you refine your skills and dominate high-level matches.
Effective Engagement, Escape, and Positioning
Mastering engagement starts with optimizing your attack speed and speed. Faster attacks allow you to deal more damage in less time, while increased mobility helps you reposition quickly during fights. Use moves like Water Shuriken to sustain pressure and Smokescreen to evade threats.
Escape strategies are equally important. Always keep an eye on your surroundings and use battle items like Eject Button for quick getaways. Positioning yourself in grass or behind obstacles can also make you harder to target, giving you the upper hand.
Here are some advanced techniques to practice:
- Use Surf to close gaps and reset cooldowns for follow-up attacks.
- Combine Double Team with Smokescreen to confuse opponents and create openings.
- Prioritize high-value targets like Attackers and Supporters to disrupt enemy strategies.
Optimizing Attack Speed and Mobility
Your attack speed and mobility are key to success in competitive play. Items like Muscle Band and Float Stone enhance these stats, allowing you to deal consistent damage while staying agile. Focus on farming efficiently to level up quickly and unlock critical abilities.
Practice drills can help you refine these skills. For example, try engaging in 1v1 scenarios to improve your timing and precision. Analyze your performance after each match to identify areas for improvement.
“Adaptability is the hallmark of a great player. Always be ready to adjust your strategy based on the flow of the game.”
Utilizing Battle Items and Understanding Effects
Choosing the right battle item can make a significant difference. Items like Scope Lens increase critical hit damage, while Focus Band provides healing when your health is low. Understanding the effect of each item ensures you’re prepared for any situation.
Here’s a quick guide to using battle items effectively:
- Use Eject Button for quick escapes or repositioning during fights.
- Activate X Attack to boost your damage output in critical moments.
- Save Potion for emergencies to sustain your health during prolonged engagements.
By mastering these techniques, you can dominate even the toughest matches. Remember, continuous improvement and adaptation are key to staying ahead in competitive play.
Conclusion
To wrap up, this guide has covered essential strategies to enhance your gameplay. From mastering core moves to selecting optimal items, each tip is designed to maximize your damage output and improve your overall performance.
Strategic movement and positioning are key to success. Whether you’re farming wild Pokémon or engaging in battles, staying aware of your surroundings ensures you’re always one step ahead. Adapting to the current meta and learning from community insights will keep your strategies fresh and effective.
Experiment with the techniques shared here and refine them to suit your playstyle. Share your experiences and learn from others to foster continuous improvement. Most importantly, enjoy the process and strive for excellence on the battlefield!


Leave a Comment