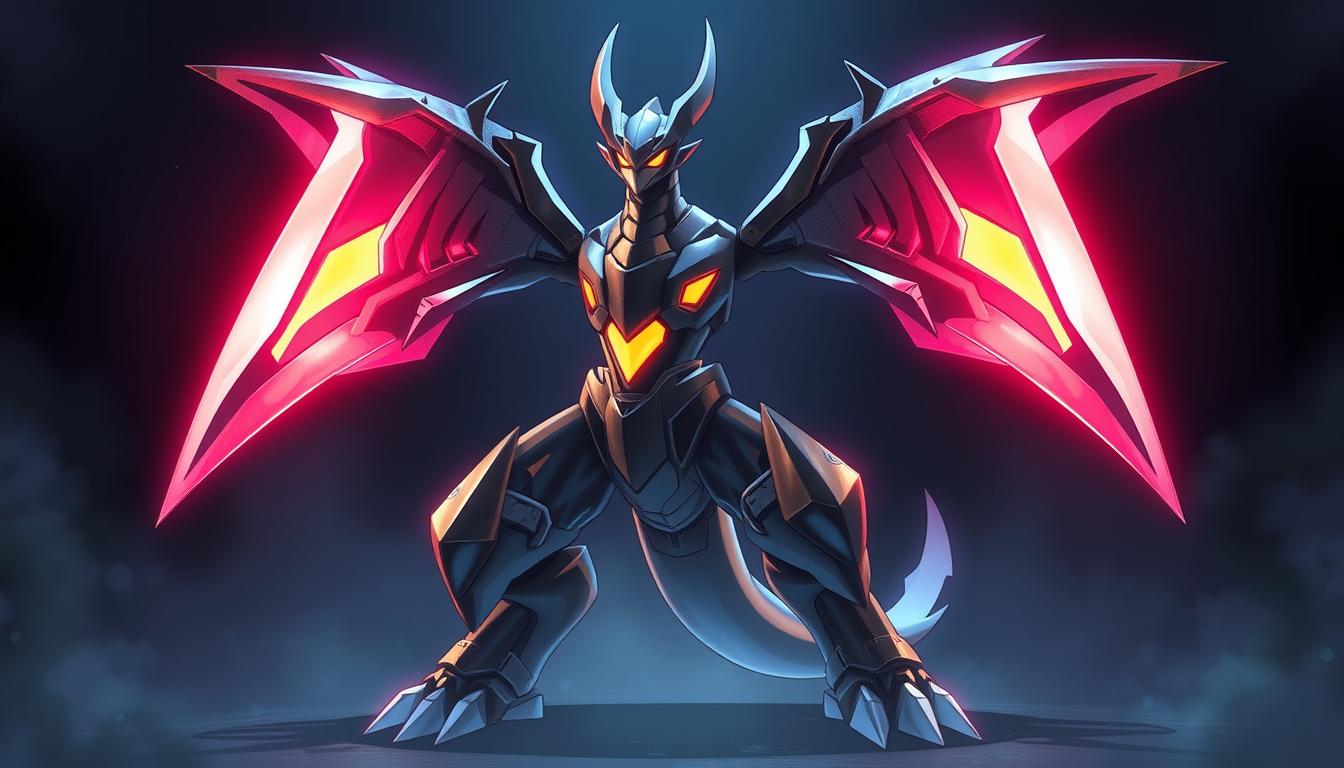
Welcome to the ultimate guide for mastering Ceruledge in the latest version of the popular team-based game. Whether you’re a seasoned player or just starting, this guide will help you unlock the full potential of this powerful character. We’ll dive into the best moveset and item combinations to dominate your matches in 2025.
Ceruledge is a versatile fighter with unique abilities that can turn the tide of any battle. Understanding its strengths and weaknesses is key to creating an effective strategy. This guide covers everything from its top moves to the most efficient item builds, ensuring you’re always one step ahead of your opponents.
With the right setup, Ceruledge can become an unstoppable force on the battlefield. Let’s explore the best ways to maximize its potential and secure victory in every match.
Key Takeaways
- Discover the top moveset for Ceruledge in 2025.
- Learn the best item combinations to enhance performance.
- Understand how to adapt your strategy based on game updates.
- Gain insights into maximizing Ceruledge’s unique abilities.
- Get tips for both new and experienced players.
Introduction to Ceruledge in Pokemon Unite
Ceruledge has quickly become a fan-favorite in the competitive scene since its introduction. This fiery fighter brings a unique blend of speed and power, making it a versatile choice for players. Whether you’re new to the game or a seasoned veteran, understanding Ceruledge’s strengths is key to dominating matches.
Ceruledge’s role as an All-rounder allows it to adapt to various situations. Its abilities, like Bitter Blade and Flame Charge, provide both offensive and defensive advantages. With a cost of 13,000 Aeos Coins or 575 Aeos Gems, it’s a valuable addition to any team.
Overview and Context
Since its release, Ceruledge has been a game-changer. Its stats and moveset make it a top pick for players looking to maximize their impact. Here’s a quick breakdown of its key attributes:
| Stat | Level 1 | Level 15 |
|---|---|---|
| HP | 3250 | 7850 |
| Attack | 125 | 430 |
| Defense | 80 | 320 |
These stats highlight Ceruledge’s growth potential. Its ability to deal consistent damage while sustaining itself makes it a formidable opponent.
Why This Guide is Essential for 2025
As the game evolves, so do strategies. This guide ensures you stay ahead of the curve. With updates and balance changes, understanding Ceruledge’s moveset and effect on the battlefield is crucial.
By mastering its abilities and pairing them with the right items, you can unlock Ceruledge’s full potential. This guide provides step-by-step insights to help you dominate in 2025 and beyond.
Understanding Ceruledge’s Role and Abilities
Ceruledge’s design as an All-Rounder offers a balanced mix of offense and defense. This makes it a versatile choice for players who want to adapt to different situations. Its tier rating places it among the top picks for competitive play, thanks to its high attack and sustain capabilities.
Tier Rating, Role, and Damage Type
As an S-tier All-Rounder, Ceruledge excels in both dealing and absorbing damage. Its physical attack type and melee nature make it a close-range threat. This allows it to dominate in skirmishes and team fights, especially when paired with the right items.
Key Passive Impacts and Effects
Ceruledge’s passive abilities significantly influence its gameplay. For example, its Wound Counter deals damage over time, while its movement speed increases when hit. These effects make it a persistent threat on the battlefield.
Additionally, its stats grow steadily, ensuring it remains effective throughout the match. By understanding these abilities, players can maximize Ceruledge’s potential and secure victories more consistently.
The Core Moveset: Psycho Cut and Flame Charge
Mastering Ceruledge’s core moveset is essential for dominating matches in 2025. Two moves stand out as the foundation of its gameplay: Psycho Cut and Flame Charge. These abilities not only deal significant damage but also enhance Ceruledge’s mobility and utility in battles.
What Each Move Brings to the Table
Psycho Cut is Ceruledge’s primary damage-dealing move. It slows enemies, making it easier to land follow-up attacks. With a high critical hit ratio, this move can turn the tide of a fight in your favor.
Flame Charge, on the other hand, boosts Ceruledge’s attack speed and provides mobility. This move is perfect for repositioning during fights or chasing down fleeing opponents. Its dual role makes it a versatile addition to the moveset.
Synergy Between Moves
When used together, Psycho Cut and Flame Charge create a powerful synergy. The slow effect from Psycho Cut allows Ceruledge to stay close to its target, while Flame Charge’s attack speed boost maximizes damage output. This combination is especially effective in team fights, where consistent damage is crucial.
Additionally, both moves benefit from cooldown reduction and passive triggers. For example, Flame Charge’s cooldown is reduced when it hits an opponent, allowing for more frequent use. This dynamic makes Ceruledge a persistent threat on the battlefield.
| Move | Power | Accuracy | Effect |
|---|---|---|---|
| Psycho Cut | 70 | 100% | Slows enemies |
| Flame Charge | 50 | 100% | Boosts attack speed |
By mastering these moves and their synergy, you can unlock Ceruledge’s full potential. Whether you’re a beginner or a seasoned player, this moveset will help you dominate matches in 2025.
pokemon unite ceruledge build: Essential Moves and Items
To dominate matches with Ceruledge, focusing on an aggressive playstyle is key. This section dives into the essential moves and items that amplify its offensive potential. By pairing the right moves with specific items, you can maximize damage and control the battlefield.
Incorporating Moves for Aggressive Play
Ceruledge’s moveset is designed for high-damage output. Moves like Psycho Cut and Flame Charge are perfect for aggressive players. Psycho Cut slows enemies, making it easier to land follow-up attacks. Flame Charge boosts attack speed and mobility, allowing you to chase down opponents or reposition during fights.
When paired with items like Muscle Band and Razor Claw, these moves become even more effective. Muscle Band increases basic attack damage, while Razor Claw enhances critical hit chances. This combination ensures consistent damage output throughout the match.
Here’s a quick breakdown of how these items enhance Ceruledge’s gameplay:
- Muscle Band: Boosts basic attack damage, especially effective after using moves.
- Razor Claw: Increases critical hit rate, making each attack more impactful.
By utilizing these items and moves, you can create a build that focuses on relentless aggression. This approach not only maximizes damage but also keeps opponents on their toes.
For example, after using Psycho Cut, follow up with a boosted basic attack to stack Weak Armor marks. This synergy allows Ceruledge to deal significant damage while maintaining mobility. With the right strategy, you can dominate matches and secure victories consistently.
Optimal Item Combinations for Superior Damage
Choosing the right items can significantly boost your performance in battles. The right combination not only enhances your attack but also ensures consistent damage output. This section explores the best item setups to maximize your effectiveness on the battlefield.
Muscle Band, Razor Claw, and Scope Lens Explained
The Muscle Band is a must-have for increasing basic attack damage and speed. At Level 30, it boosts attack by +15 and critical-hit rate by +6%. This makes it ideal for sustained damage during fights.
The Razor Claw complements this by enhancing burst damage. Its critical-hit damage boost pairs perfectly with moves like Psycho Cut, allowing for devastating follow-up attacks. Together, these items create a powerful synergy.
Adding the Scope Lens further amplifies critical-hit chances. This trio ensures your attacks are both frequent and impactful, making it a top choice for aggressive playstyles.
Alternative Item Options and Their Effects
If you prefer a different approach, consider items like Attack Weight or Float Stone. Attack Weight increases your attack stats as you score goals, while Float Stone boosts movement speed when out of combat.
These alternatives offer flexibility based on your playstyle. For example, Attack Weight is great for players who focus on scoring, while Float Stone suits those who prioritize mobility.
Ultimately, the best build depends on your strategy. Experiment with different combinations to find what works best for you.
Held Items and Battle Items: A Complete Overview
Understanding the right items to equip can make or break your in-game performance. This section dives into the best held and battle items to enhance your gameplay. By choosing the right combination, you can boost your attack speed, sustain, and overall effectiveness in battles.

Top Held Items and Their Benefits
Held items are essential for improving your stats and abilities. The Razor Claw is a popular choice for increasing critical hit chances, making it perfect for aggressive playstyles. Pair it with Attack Weight to boost your attack stats as you score goals, ensuring consistent damage output.
Another great option is the Muscle Band, which enhances basic attack damage and speed. This item is ideal for sustained damage during fights, especially when combined with moves like Psycho Cut. These items work together to create a powerful synergy, maximizing your impact on the battlefield.
Battle Items to Boost In-Game Performance
Battle items provide additional utility during matches. The Eject Button is a versatile choice, offering a quick escape or repositioning tool. It’s particularly useful for avoiding ambushes or closing the gap on fleeing opponents.
For sustain, consider the Full Heal item. It purges negative effects, allowing you to stay in the fight during intense moments. This item is especially valuable in teamfights, where crowd control can quickly turn the tide.
By pairing the right held and battle items, you can create a complete setup that complements your build and playstyle. Experiment with different combinations to find what works best for you and dominate every match.
Effective Strategy and Combos for Maximum Impact
Unlocking Ceruledge’s full potential requires mastering its combos for maximum impact. These combinations not only deal significant damage but also enhance its utility in battles. By understanding the synergy between moves, you can dominate matches and secure victories consistently.
Scorching Strikes Combo Breakdown
The Scorching Strikes combo is a powerful sequence that maximizes damage output. Start with Psycho Cut to slow your target, then follow up with Flame Charge to boost attack speed. This combination ensures sustained damage while keeping your opponent within range.
For added burst, use a boosted basic attack after Flame Charge. This synergy between moves and attacks creates a relentless assault, making it ideal for team fights or 1v1 encounters.
Psycho Charge and Phantom Strikes Combos
The Psycho Charge combo focuses on quick, high-damage bursts. Begin with Psycho Cut to slow the enemy, then use Phantom Force to close the gap and deal massive damage. This combo is perfect for finishing off low-health opponents or disrupting enemy formations.
For sustained damage, chain Phantom Force with boosted attacks. This approach maximizes your damage output while maintaining mobility, ensuring you stay effective throughout the match.
By mastering these combos, you can unlock Ceruledge’s full potential and dominate every match. Whether you’re focusing on burst damage or sustained attacks, these strategies will help you emerge victorious.
Leveling and Progression Tips: Early, Mid, and Late Game
Mastering the art of leveling up quickly is crucial for dominating matches from start to finish. This guide breaks down the best strategies for each phase of the game, ensuring you stay ahead of the competition. Whether you’re focusing on lane farming or jungle progression, these tips will help you maximize your impact.
Early Game Priorities and Leveling Up Fast
In the early game, your focus should be on reaching higher levels quickly. Start by farming Wild Pokémon in your lane or jungle. This ensures a steady flow of experience points and gold. Prioritize securing objectives like Regice or Registeel to gain a team advantage.
Use moves like Psycho Cut to clear waves efficiently. Pair this with items like Muscle Band to boost your damage output. Timing is key—aim to hit Level 6 before your opponents to gain an edge.
Transitioning to Advanced Play
As you progress to mid and late game, adapt your gameplay to match the evolving dynamics. Focus on team fights and securing major objectives like Zapdos. Use your increased stats and abilities to dominate the battlefield.
Healing items can sustain you during prolonged engagements. Combine this with damage-boosting items to maximize your effectiveness. Always balance risk and reward—know when to push and when to retreat.
| Phase | Focus | Key Tips |
|---|---|---|
| Early Game | Leveling Up | Farm Wild Pokémon, secure objectives. |
| Mid Game | Team Fights | Use healing items, maximize damage. |
| Late Game | Objectives | Secure Zapdos, balance risk and reward. |
By following these strategies, you can ensure a smooth progression through each phase of the game. Adapt your build and playstyle to match the situation, and you’ll dominate every match.
Maximizing Attack Speed and Critical Hit Opportunities
Boosting your in-game performance starts with optimizing attack speed and critical hits. These elements are crucial for dealing consistent damage and creating openings during battles. By focusing on these areas, you can enhance your gameplay and dominate your opponents.
Enhancing Critical Rate with Recommended Items
To increase your critical hit chances, equip items like the Razor Claw. This item boosts critical-hit damage, making it perfect for aggressive playstyles. Pair it with the Scope Lens to further amplify your critical rate.
Another great option is the Muscle Band, which enhances basic attack speed and damage. These items work together to create a powerful synergy, ensuring your attacks are both frequent and impactful.
Balancing Attack Speed for Consistent Damage
While increasing attack speed is important, balancing it with raw power is key. Use moves like Flame Charge to boost your speed temporarily, allowing for quick bursts of damage. This approach ensures you maintain a relentless offensive flow.
Managing cooldown times is also crucial. Items like the Energy Amplifier can help reduce cooldowns, allowing you to use moves more frequently. This balance ensures you stay effective throughout the match.
By fine-tuning your build and focusing on these strategies, you can maximize your attack speed and critical hit opportunities. This approach not only improves your damage output but also keeps your opponents on their toes.
Managing Cooldowns and Move Timing
Timing is everything when it comes to maximizing your in-game performance. Properly managing cooldowns ensures you can use abilities at the right moment, giving you an edge in battles. This section will guide you on how to optimize move usage and link abilities seamlessly for maximum impact.
Optimizing Move Usage in Fights
Effective move timing starts with understanding your abilities. For example, using Psycho Cut to slow enemies before following up with a basic attack can maximize damage. This combo not only deals significant damage but also keeps your opponent within range.
Monitoring cooldowns is crucial during teamfights. Always keep an eye on your ability timers to ensure you’re ready for the next engagement. Adjust your tactics based on the situation, whether it’s pushing forward or retreating to regroup.
Stat trade-offs also play a role in move timing. Items that reduce cooldown times, like the Energy Amplifier, can help you use abilities more frequently. Balancing these stats ensures you stay effective throughout the match.
Here are some practical tips for optimizing move usage:
- Use Psycho Cut to slow enemies before landing follow-up attacks.
- Chain moves like Flame Charge with boosted basic attacks for sustained damage.
- Monitor cooldowns and adjust your strategy based on the flow of the battle.
By mastering these techniques, you can make the most of every opportunity during fights. Precision in move execution and cooldown management will elevate your gameplay and help you dominate the battlefield.
Matchup Guide: Counters and Synergistic Teammates
Understanding how to counter opponents and work with teammates is essential for dominating matches. This guide provides strategies for handling fragile yet high-damage rivals and engaging durable all-rounders. By adjusting your build and tactics, you can exploit their weaknesses and secure victories.
Strategies Against Fragile Rival Pokemon
Fragile opponents like Alolan Ninetales rely on high damage but lack durability. Use moves like Psycho Cut to slow them down and land follow-up attacks. Pair this with items like Razor Claw to maximize critical hits and burst damage.
Focus on positioning to avoid their ranged attacks. Stay mobile and use abilities like Flame Charge to close the gap quickly. This approach ensures you can eliminate them before they deal significant damage.
Tactics for Engaging Durable All-Rounders
Durable all-rounders like Blastoise and Mamoswine require a different approach. Their high defense and sustain make them challenging to take down. Use Psycho Cut to reduce their mobility and create openings for your team.
Equip items like Muscle Band to enhance your sustained damage. Coordinate with teammates to focus fire and overwhelm them. This combination of strategy and teamwork is key to defeating these tough opponents.
By mastering these tactics, you can adapt to any matchup and dominate the battlefield. Whether you’re facing fragile or durable opponents, the right build and strategy will ensure your success.
Additional Lane-Specific Tips and Strategies
Mastering lane-specific strategies can give you a significant edge in competitive play. Each lane requires a unique approach to maximize your impact and secure early advantages. Whether you’re in the top lane, jungle, or bot lane, understanding these dynamics is key to dominating the map.

Top Lane Tactics
In the top lane, focus on securing objectives like Regice or Registeel. These provide valuable buffs for your team. Use moves like Psycho Cut to clear waves quickly and maintain lane control. Pair this with items like Muscle Band to boost your attack speed and damage output.
Stay cautious of enemy ganks and position yourself near bushes for safety. Timing your moves and managing energy efficiently will help you dominate the early game.
Jungle Farming and Bot Lane Strategies
Jungle farming is essential for leveling up quickly. Prioritize clearing camps to reach Level 5 before your opponents. Use Flame Charge to enhance mobility and secure kills on wild Pokémon. This ensures you’re ready for critical team objectives like Drednaw.
In the bot lane, coordinate with your teammate to zone opponents and secure last hits. Use moves like Psycho Cut to slow enemies and create openings for your team. Balancing aggression with cautious play is key to maintaining control.
By adapting your build and strategy to each lane, you can maximize your effectiveness and dominate every match. Experiment with different tactics to find what works best for your playstyle.
Utilizing Emblems and Stat Trade-Offs for Optimal Build
Customizing your emblem setup is a game-changer for optimizing your in-game performance. By carefully selecting emblem color combinations and prioritizing specific stats, you can create a build that maximizes your effectiveness. This section explores how to balance these elements for the best results.
Emblem Color Combinations for Damage and HP
Choosing the right emblem colors can significantly impact your damage output and survivability. For example, red emblems boost attack stats, while white emblems increase HP. Combining these colors creates a balanced setup that enhances both offense and defense.
Here’s a quick breakdown of popular emblem combinations:
- Red + White: Boosts attack and HP, ideal for aggressive playstyles.
- Black + Red: Increases attack and reduces cooldowns, perfect for sustained damage.
- White + Blue: Enhances HP and defense, great for tankier builds.
Prioritizing Stats for Maximum Effectiveness
When customizing your build, focus on stats that align with your playstyle. For damage-focused players, prioritize attack and critical-hit rate. Items like Razor Claw and Attack Weight can further amplify these stats.
For a more balanced approach, consider trading off some attack for additional HP or defense. This ensures you can sustain longer in battles while still dealing significant damage.
“The right emblem setup can turn the tide of any match. Focus on stats that complement your strategy.”
By experimenting with different combinations and prioritizing key stats, you can create a build that suits your needs. Whether you’re aiming for maximum damage or a balanced approach, the right choice of emblems and stats will elevate your gameplay.
Conclusion
Mastering the right strategy and setup can elevate your gameplay to new heights. This guide has covered the essential elements to maximize your effectiveness, from the best moveset to optimal item choices like Attack Weight. By combining moves like Flame Charge and Psycho Cut, you can create powerful combos that dominate the battlefield.
Timing and cooldown management are crucial for maintaining momentum. Use healing items strategically to sustain yourself during intense fights. Experiment with emblem setups to find the perfect balance between damage and survivability.
Every player has a unique style, so adapt the advice in this guide to fit your preferences. Whether you’re focusing on aggressive plays or balanced strategies, the right approach will lead to success. Use this as a reference point for future games and make every match count!


Leave a Comment