
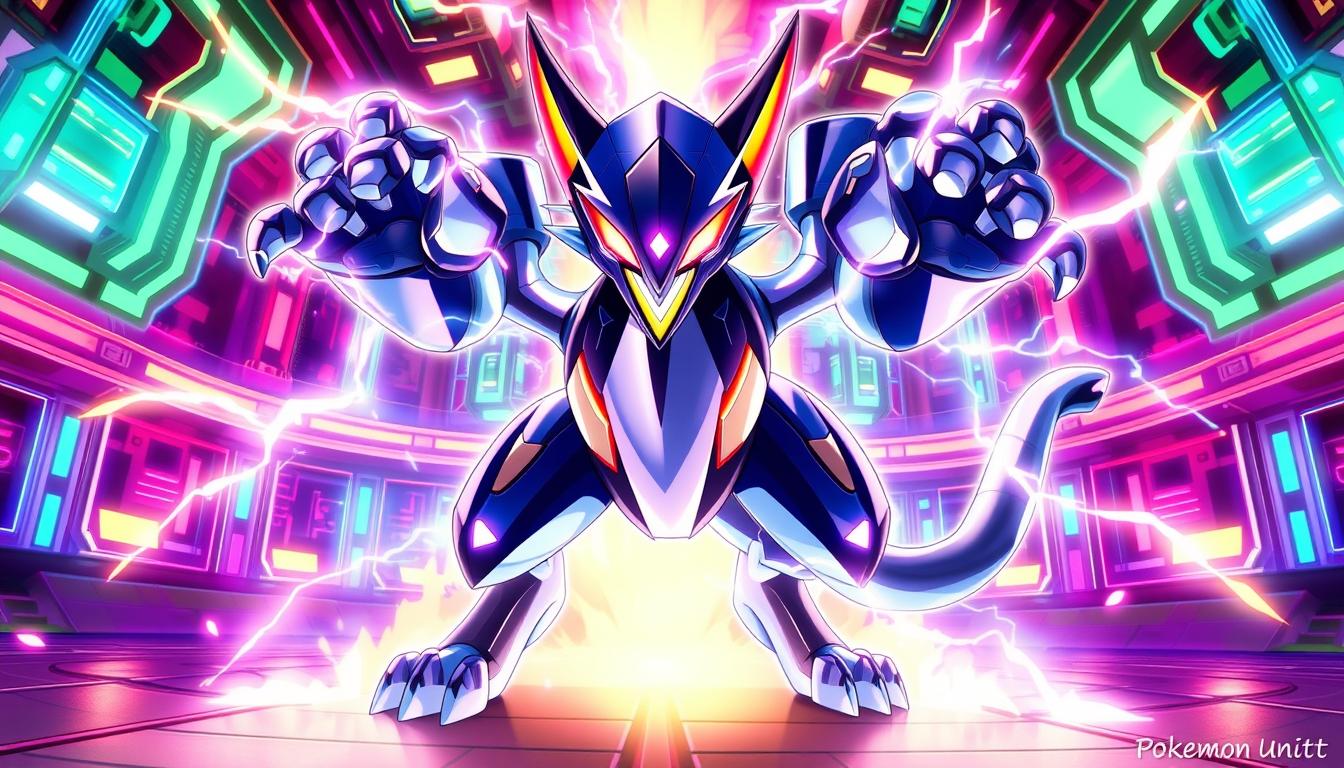
Welcome to the ultimate guide for mastering Miraidon in Pokemon Unite! Whether you’re a seasoned player or just starting, this guide is designed to help you dominate the battlefield in 2025. We’ll dive into the best moveset, optimal item choices, and gameplay strategies to make Miraidon a powerhouse on your team.
Miraidon, known for its electrifying abilities, is a top-tier Attacker that can turn the tide of any match. With its unique skills like Hadron Engine and Thunder Wave, it brings both damage and utility to the table. This version of the guide includes the latest updates, nerfs, and buffs to ensure you’re always ahead of the competition.
Understanding Miraidon’s role is crucial. It excels in ranged combat, dealing massive damage while supporting allies with its electric field. By the end of this guide, you’ll have all the tools to maximize its potential and climb the ranks in Pokemon Unite.
Key Takeaways
- Miraidon is a top-tier Attacker with electrifying abilities.
- Optimize your moveset for maximum damage and utility.
- Choose the right items to enhance Miraidon’s performance.
- Stay updated with the latest nerfs and buffs for 2025.
- Master gameplay strategies to dominate the battlefield.
Introduction to Miraidon: An Electrifying Attacker
Step into the electrifying world of Miraidon, a high-damage Attacker that brings lightning-fast gameplay to the arena. Known for its speed and precision, this character excels in delivering devastating blows while maintaining agility. Its unique blend of long-range damage and mobility makes it a top choice for players looking to dominate the battlefield.
Miraidon’s gameplay style revolves around its high Sp. Atk and electrifying abilities. Starting with moves like Thundershock and later unlocking Thunder Wave, it offers a mix of offense and utility. Its Charge Beam and Electro Drift moves allow for repeated attacks and quick repositioning, making it a versatile choice for any team.
One of Miraidon’s standout features is its ability to control the battlefield with area-of-effect moves. For example, Thunder creates a cloud that drops thunderbolts, affecting multiple opponents. This makes it a valuable asset in team fights, where its damage output can turn the tide of the game.
Recent updates have further enhanced Miraidon’s capabilities, ensuring it remains a top-tier choice in the current version of the game. Players can leverage its natural strengths and unique abilities to outmaneuver opponents and secure victories.
| Move | Effect | Best Use |
|---|---|---|
| Charge Beam | Long-range damage with multiple charges | Poking and sustained damage |
| Thunder | Area-of-effect damage and slow | Team fights and crowd control |
| Electro Drift | Mobility and burst damage | Repositioning and finishing opponents |
For new players, Miraidon offers a friendly learning curve with its straightforward mechanics. Its high skill ceiling also makes it rewarding for experienced players who want to master its full potential. Whether you’re looking to deal massive damage or support your team, Miraidon is a reliable choice for any match.
Miraidon’s Role, Stats, and Basic Information
Miraidon’s role as an Attacker makes it a top choice for players. It specializes in dealing massive damage from a distance, making it a key player in any team. With its high Special Attack stat, it can quickly turn the tide of a match.
Its base stats highlight its strengths. Miraidon boasts a high Special Attack of 205 at max level, ensuring devastating blows. Its Speed stat of 205 also allows for quick repositioning, making it hard to catch. These stats make it a versatile and powerful addition to any lineup.
To unlock Miraidon, players need 10,000 Aeos Coins or 575 Aeos Gems. This cost reflects its high-tier status and the value it brings to the battlefield. Its ability, Hadron Engine, boosts its Special Attack by 30% when Electric Terrain is active, further enhancing its damage output.
Recent updates have fine-tuned Miraidon’s stats and moves. These changes ensure it remains balanced while maintaining its competitive edge. Players should stay updated to adapt their strategies accordingly.
Understanding Miraidon’s stat distribution is crucial for itemization. Items like Wise Glasses and Choice Specs amplify its Special Attack, maximizing its potential. Pairing these with its natural power creates a formidable force on the battlefield.
Exploring the pokemon unite miraidon build
Discover the best strategies to optimize Miraidon’s gameplay in this detailed guide. Whether you’re a new player or a seasoned competitor, understanding the different build options is key to maximizing its potential.
Miraidon offers two primary approaches: Charge Beam and Electro Drift. The Charge Beam build focuses on sustained damage and long-range attacks, making it ideal for poking enemies from a safe distance. On the other hand, the Electro Drift setup emphasizes mobility and burst damage, perfect for quick engagements and repositioning.
Your choice of build can significantly impact your success in matches. A well-crafted setup ensures synergy between moves, items, and emblems, enhancing Miraidon’s overall performance. For example, pairing Charge Beam with items like Wise Glasses amplifies its damage output, while Electro Drift benefits from mobility-enhancing tools like the Eject Button.
Experimentation is encouraged. Try different combinations to find what works best for your playstyle. This guide provides a foundation, but adapting to specific matchups and team dynamics is equally important.
Ultimately, your build decisions shape Miraidon’s effectiveness on the battlefield. Whether you prioritize damage, mobility, or utility, the right setup can turn you into a formidable force in every match.
Moveset Deep Dive: Charge Beam, Thunder, and Electro Drift
Mastering Miraidon’s moveset is essential for dominating the battlefield. Each move offers unique advantages, from long-range damage to crowd control and mobility. Understanding their mechanics and synergies can significantly enhance your gameplay.
Charge Beam: Power, Range, and Setup
Charge Beam is a versatile move that excels in long-range combat. It allows for multiple charges, making it ideal for sustained damage. The move’s range ensures you can poke enemies from a safe distance, keeping them on their toes.
When fully charged, it unleashes a powerful electrical beam, dealing significant damage to targets. Proper timing and positioning are crucial to maximize its effect. Use it to chip away at opponents’ health before engaging in close combat.
Thunder: Slow Effects and Synergy
Thunder is a game-changer in team fights. It creates a cloud that drops thunderbolts, damaging and slowing multiple opponents. This move is perfect for controlling the battlefield and setting up follow-up attacks.
Its synergy with Charge Beam is undeniable. The slow effect makes it easier to land precise hits, amplifying your damage output. Use Thunder to disrupt enemy formations and create opportunities for your team.
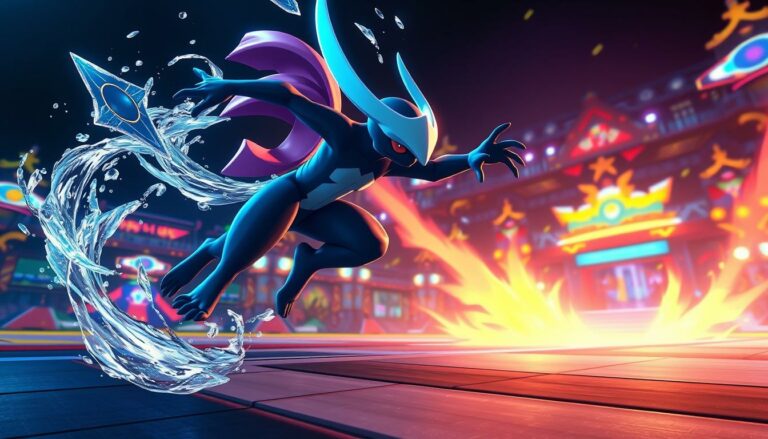
Electro Drift & Parabolic Charge: Mobility and Burst
Electro Drift offers unparalleled mobility and burst damage. It allows you to reposition quickly, making it harder for enemies to target you. The move’s electric power accumulates, unlocking a more potent version for finishing off low-health opponents.
Pairing it with Parabolic Charge enhances its utility. Parabolic Charge heals you and replenishes stored uses of Electro Drift or Charge Beam, depending on the number of targets hit. This combination ensures sustained pressure on the enemy team.
„Proper move timing and setup are the keys to success in competitive play. Mastering these synergies will make you a formidable opponent.“
| Move | Effect | Best Use |
|---|---|---|
| Charge Beam | Long-range damage with multiple charges | Poking and sustained damage |
| Thunder | Area-of-effect damage and slow | Team fights and crowd control |
| Electro Drift | Mobility and burst damage | Repositioning and finishing opponents |
Each move’s mechanics—range, power, and cooldown—play a vital role in combat strategy. Experiment with different combinations to find what works best for your playstyle. With practice, you’ll harness the full potential of Miraidon’s moveset.
Itemization Breakdown for Optimal Performance
Choosing the right items can make or break your performance in competitive play. Proper itemization ensures you maximize your strengths and cover any weaknesses. This section dives into the best options for enhancing your gameplay, focusing on core items and additional tools.
Core Items: Wise Glasses, Choice Specs, and Slick Spoon
Wise Glasses are a must-have for boosting Special Attack (Sp. Atk). They synergize perfectly with Miraidon’s natural stats, increasing its damage output significantly. For example, pairing Wise Glasses with Charge Beam can elevate its damage to 4502 at Level 15.
Choice Specs amplify your burst potential by increasing the minimum damage of your moves. This item is particularly effective for finishing off low-health opponents. With Choice Specs, Charge Beam’s initial damage reaches 608, making it a powerful tool for quick engagements.
Slick Spoon offers a dual benefit, increasing both Sp. Atk and HP. This makes it a versatile choice for players who want to balance offense and survivability. Its unique stats ensure you stay in the fight longer while dealing consistent damage.
Additional Tools: Curse Incense, Eject Button, and Beyond
Curse Incense is a situational item that reduces the healing capabilities of your opponents. It’s particularly useful in matches where sustain is a key factor. This tool can turn the tide in prolonged team fights.
Eject Button provides unmatched mobility, allowing you to reposition quickly during battles. Its utility is invaluable for escaping dangerous situations or closing the gap on fleeing enemies. This item complements Miraidon’s natural agility, making it harder for opponents to pin you down.
„Strategic itemization is the backbone of competitive success. The right setup ensures you’re always ready for any challenge.“
Experiment with different combinations to find what works best for your playstyle. Whether you prioritize damage, mobility, or utility, the right items can elevate your performance and help you dominate the battlefield.
Charge Beam Build: Strategy and Execution
The Charge Beam build is a powerhouse strategy for players seeking consistent damage and precision. This setup focuses on maximizing your move’s potential while managing resources effectively. With the right approach, you can dominate the battlefield and outlast your opponents.
Balancing Damage Output with Cooldown Management
One of the key challenges with the Charge Beam build is balancing damage output with cooldown management. This move relies on multiple charges, so timing is crucial. Use it to poke enemies from a safe distance, then retreat to recharge before engaging again.
Practice mode tests show that fully charged Charge Beam deals up to 4502 damage at Level 15. Pairing it with items like Choice Specs and Wise Glasses amplifies this effect, making it a devastating tool for sustained pressure.
- Maximize Damage: Use Charge Beam to chip away at opponents’ health before committing to a fight.
- Manage Cooldowns: Avoid spamming the move; wait for optimal moments to strike.
- Positioning: Stay at a safe distance to avoid counterattacks while maintaining pressure.
Items like Choice Specs and Wise Glasses are pivotal for reinforcing burst damage. Choice Specs increase the minimum damage of your move, while Wise Glasses boost your Special Attack, ensuring consistent damage output.
„Mastering the Charge Beam build requires precision and patience. Proper timing and positioning can turn you into a relentless force on the battlefield.“
By focusing on these strategies, you can harness the full potential of the Charge Beam build. Whether you’re dealing sustained damage or setting up for a finishing blow, this setup ensures you’re always a step ahead of your opponents.
Electro Drift Build: Mobility and Burst Damage
The Electro Drift build offers unmatched mobility and burst damage, making it a top choice for aggressive players. This setup focuses on quick engagements and repositioning, allowing you to outmaneuver opponents while dealing significant damage. With its recent adjustments, this build remains a powerful option in competitive play.
Utilizing Parabolic Charge for Combo Replenishment
Parabolic Charge plays a crucial role in this build. It replenishes stored uses of Electro Drift or Charge Beam, depending on the number of targets hit. This mechanic ensures sustained pressure during combos, making it easier to chain attacks without running out of resources.
For example, hitting multiple opponents with Parabolic Charge can fully restore your Electro Drift charges. This synergy allows for continuous aggression, keeping your enemies on the defensive.
Repositioning Tactics for Safety and Impact
Repositioning is key to maximizing the Electro Drift build’s potential. Use the move’s dash ability to escape dangerous situations or close the gap on fleeing opponents. Pairing it with the Eject Button enhances your mobility, making it harder for enemies to pin you down.
- Aggressive Engagements: Use Electro Drift to initiate fights and deal burst damage.
- Safe Retreats: Dash away from threats to minimize risk.
- Strategic Positioning: Stay on the move to maintain pressure and control the battlefield.
„Mastering repositioning tactics ensures you stay one step ahead of your opponents, turning every engagement into an opportunity for victory.“
Compared to the Charge Beam build, Electro Drift excels in mobility and burst damage. While Charge Beam focuses on sustained damage from a distance, Electro Drift allows for quick, impactful strikes. Choose the build that best suits your playstyle and team needs.
For optimal performance, consider items like the Energy Amplifier to boost your burst potential. This item enhances your damage output during critical moments, ensuring you can finish off opponents with ease. Combine it with mobility tools like the Eject Button for maximum effectiveness.
Combos and Move Synergies
Unlocking the full potential of Miraidon’s abilities requires mastering its combos and move synergies. These combinations allow you to maximize damage output while maintaining control over the battlefield. By understanding how moves interact, you can create devastating sequences that leave opponents scrambling.

Piercing Lightning and Rolling Thunder Strategies
The Piercing Lightning combo focuses on chaining Charge Beam with Thunder for maximum impact. Start by using Charge Beam to poke enemies from a distance. Once they’re within range, follow up with Thunder to slow and hit multiple targets. This sequence ensures sustained pressure while setting up for finishing blows.
For the Rolling Thunder strategy, combine Thunder with Electro Drift for mobility and burst damage. Use Thunder to create a zone of control, then dash in with Electro Drift to deal massive damage. This combo is perfect for quick engagements and repositioning during team fights.
„Mastering these combos ensures you’re always one step ahead, turning every move into a strategic advantage.“
Here’s a step-by-step breakdown of executing these combos:
- Piercing Lightning: Start with Charge Beam to weaken opponents, then use Thunder to slow and finish them off.
- Rolling Thunder: Initiate with Thunder to control the area, then dash in with Electro Drift for burst damage.
Timing and targeting are crucial. Proper execution ensures you maximize damage while minimizing risks. For example, using Charge Beam Thunder in sequence can deal up to 4502 damage at Level 15, making it a game-changer in competitive play.
Each combo has situational advantages. Piercing Lightning excels in long-range engagements, while Rolling Thunder is ideal for quick, aggressive plays. Experiment with these strategies to find what works best for your playstyle.
Emblem and Battle Item Optimization
Optimizing your setup with the right emblems and battle items can significantly boost your performance. These elements work together to enhance your strengths and cover weaknesses, ensuring you’re always ready for any challenge.
Green and Black Emblems: Enhancing Damage and Cooldowns
Green Emblems are ideal for increasing damage output. They provide a noticeable boost to your attacks, making them perfect for aggressive playstyles. Pairing them with items like Wise Glasses amplifies their effect, ensuring maximum impact in every encounter.
On the other hand, Black Emblems focus on reducing cooldowns. This allows you to use your moves more frequently, maintaining pressure on opponents. Combining them with items like the Energy Amplifier creates a seamless flow of attacks, keeping you in control of the battlefield.
Optimal Emblem Stacking Methods
To maximize efficiency, focus on stacking emblems that complement your playstyle. For example, a mix of Green and Black emblems balances damage and cooldown reduction. This setup ensures you’re always ready to strike while maintaining flexibility.
High-level players often use specific configurations to optimize their builds. For instance, a 6 Green and 4 Black emblem setup provides a strong balance between damage and utility. Experiment with different combinations to find what works best for you.
Battle Item Optimization
Choosing the right battle items is just as important as selecting emblems. Items like the Eject Button enhance mobility, allowing you to reposition quickly during battles. Pairing them with emblems that reduce cooldowns ensures you’re always ready to react.
For example, combining the Eject Button with Black emblems creates a highly mobile setup. This allows you to escape dangerous situations or close the gap on fleeing opponents with ease.
„Strategic emblem and item choices are the backbone of competitive success. The right setup ensures you’re always ready for any challenge.“
By focusing on these strategies, you can create a powerful setup that enhances your performance. Whether you prioritize damage, mobility, or utility, the right emblems and items can turn you into a formidable force on the battlefield.
Leveling Up: Timing and Progression Tactics
Effective leveling strategies are crucial for dominating the battlefield and unlocking your character’s full potential. This guide will walk you through the best tactics to maximize your level progression, ensuring you’re always ahead of the competition.
Early Game Farming and Wild Pokémon Objectives
In the early game, focus on farming wild Pokémon to gain experience and level up quickly. Start by targeting weaker wild Pokémon like Aipom and Audino. These provide consistent experience points and help you reach key levels faster.
Timing is essential. Aim to secure the first wave of wild Pokémon before the 9:00 mark. This ensures you’re ready for the first major objective, such as the central area’s Ludicolo. Proper farming sets the foundation for a strong mid-game.
- Prioritize Aipom and Audino: These are quick and easy targets for early experience.
- Secure the First Wave: Timing your farming ensures you’re ready for objectives.
- Team Coordination: Work with teammates to clear areas efficiently.
Mid to Late Game Strategies for Securing Objectives
As the game progresses, shift your focus to securing major objectives like Drednaw and Rotom. These provide significant team advantages and help you maintain control over the battlefield. Use your build to maximize damage and utility during these critical moments.
For example, combining Charge Beam with Thunder can deal massive damage to objectives while slowing opponents. This ensures your team can secure the goal without interference.
„Strategic timing and coordination are key to securing objectives and maintaining dominance in the late game.“
Here’s a breakdown of key objectives and their benefits:
| Objective | Benefit | Best Timing |
|---|---|---|
| Drednaw | Team-wide experience and shields | 7:00 and 4:00 marks |
| Rotom | Pushes lanes and distracts opponents | 6:00 and 3:00 marks |
| Zapdos | Instant scoring opportunity | 2:00 mark |
By focusing on these strategies, you can ensure your team maintains control and secures victory. Proper leveling and objective timing are the cornerstones of success in competitive play.
Matchups, Counters, and Team Strategies
Understanding your matchups and counters is key to dominating the battlefield. Knowing which opponents pose a threat and how to counter them can make all the difference in securing victory. This section dives into strategies for handling hard counters, fragile enemies, and optimizing team synergy.
Analyzing Hard Counters and Fragile Opponents
Certain opponents can be particularly challenging for Miraidon. Characters like Talonflame and Zacian excel in close-range combat, making them hard counters. To handle these threats, focus on maintaining distance and using moves like Charge Beam to poke from afar.
On the other hand, fragile enemies like Cramorant or Chandelure can be quickly neutralized with burst damage. Use Electro Drift to close the gap and finish them off before they can react. Timing and positioning are crucial to maximizing your attack efficiency.
Team Synergy and Coordinated Attacks
Miraidon thrives in a coordinated team environment. Pairing with a Defender like Trevenant can create a strong frontline, allowing you to focus on dealing damage. Use Thunder to slow enemies, setting up your teammates for follow-up attacks.
Speed is another critical factor. Characters like Zoroark or Meowscarada can complement Miraidon’s mobility, creating a fast-paced team that overwhelms opponents. Coordinate with your allies to focus on key targets and secure objectives like Drednaw or Rotom.
„Team coordination and strategic positioning are the cornerstones of success. A well-timed attack can turn the tide of any match.“
Here’s a quick matchup guide to help you strategize:
| Opponent | Strategy |
|---|---|
| Talonflame | Maintain distance, use Charge Beam for poking |
| Zacian | Focus on burst damage with Electro Drift |
| Cramorant | Neutralize quickly with high-speed attacks |
By understanding your matchups and leveraging team synergy, you can maximize Miraidon’s effectiveness and dominate the battlefield.
Harnessing Hadron Engine and Electric Terrain
Harnessing the power of Hadron Engine can turn the tide of any match. This unique ability creates Electric Terrain, boosting your damage while debuffing enemies. Understanding how to maximize its potential is crucial for dominating the battlefield.

Maximizing Damage Boosts and Debuffing Enemies
The Hadron Engine increases your Special Attack by 30% when Electric Terrain is active. This boost enhances moves like Thunder, allowing you to deal devastating damage. Electric Terrain also slows enemies, making it harder for them to escape or counterattack.
Positioning is key to maximizing these effects. Stay within the Electric Terrain to maintain the boost while forcing enemies into the debuffed zone. This strategy ensures you’re always at an advantage during team fights.
„Proper use of Hadron Engine and Electric Terrain can cripple opponents and secure victories.“
Here’s a breakdown of the effects and their benefits:
| Ability | Effect | Best Use |
|---|---|---|
| Hadron Engine | +30% Special Attack in Electric Terrain | Enhancing damage output |
| Electric Terrain | Slows enemies and debuffs goal zones | Controlling the battlefield |
Synergy between Hadron Engine and moves like Thunder is undeniable. The boost from Electric Terrain amplifies the damage of area-of-effect moves, making them even more effective. Use this combination to dominate team fights and secure objectives.
Timing is crucial. Activate Hadron Engine during critical moments to maximize its impact. Whether you’re pushing lanes or defending goals, this ability ensures you’re always a step ahead of your opponents.
By mastering these mechanics, you can turn Miraidon into an unstoppable force. Proper positioning, timing, and synergy are the keys to success.
Conclusion
As we wrap up this guide, it’s clear that mastering Miraidon’s potential requires a blend of strategy and adaptability. Whether you prefer the sustained damage of the Charge Beam setup or the mobility of the Electro Drift build, both options offer unique advantages for different playstyles.
Itemization and emblem optimization are crucial for maximizing performance. Pairing Wise Glasses with Green Emblems enhances damage, while the Eject Button ensures mobility. Leveling strategies, like early-game farming and securing objectives, also play a key role in dominating matches.
Experimentation is key. Try different combinations of moves, items, and emblems to find what works best for you. A well-rounded build not only boosts your effectiveness but also keeps you ahead in competitive play.
We’d love to hear about your experiences! Share your favorite moveset and strategies in the comments. Let’s keep the community informed and ready for the bright future of this electrifying character.

Leave a Comment